These instructions are an adaption of the official version at https://docs.btcpayserver.org/WooCommerce/
Before you begin: Ensure you have WooCommerce installed on your WordPress site. That is, you have the Shopping Cart experience available to your clients. This means you can create both virtual and tangible “products”, track your inventory and capture client shipping and billing details. If you don’t have this installed you can follow Steps 2 (starting from “Self Hosting”) to 4 in the Woo.com tutorial before you continue with these instructions below. Once completed , you can check out the other steps depending on what best suits you.
Note 1: Sections 1 to 3 below are for On-Chain Bitcoin Payments Integration only
Note 2: The strategy we are following here is based on you as a user wanting to have easy access and control over any funds as soon as they are received by your store. This means we will help you set up a non-custodial wallet on your mobile phone that will also be used for your store.
Note 3: Your store’s payment platform hosted on Lightning Bazaar’s server will not have access to the seed you will generate for the wallet on your phone. Therefore payments may only be received to your store through LB’s hosted service. They cannot be sent.
Note 4: Section 3 below will require use of a camera from your device (assuming PC, Macbook, Laptop) to scan a QR code.
1. Install BTCPay Plugin
- WordPress > Plugins > Add New.
- In Search, type “BTCPay V2”.
- Install and activate.

2. Connecting WooCommerce and BTCPay Server
BTCPay for WooCommerce V2 plugin is a bridge between your BTCPay Server (payment processor) and your e-commerce store. No matter if you’re using a self-hosted or third-party solution, the connection process is identical.
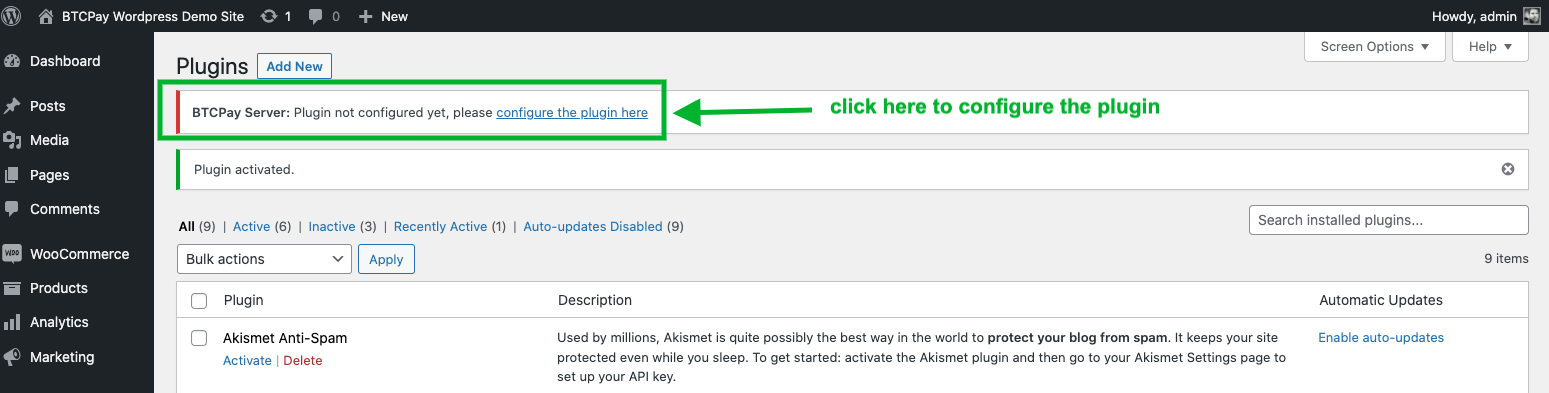
You can either click on the notifications link saying “please configure the plugin here” (see screenshot below), or:
- Go to your store dashboard.
- WooCommerce > Settings.
- Click [BTCPay Settings] tab.
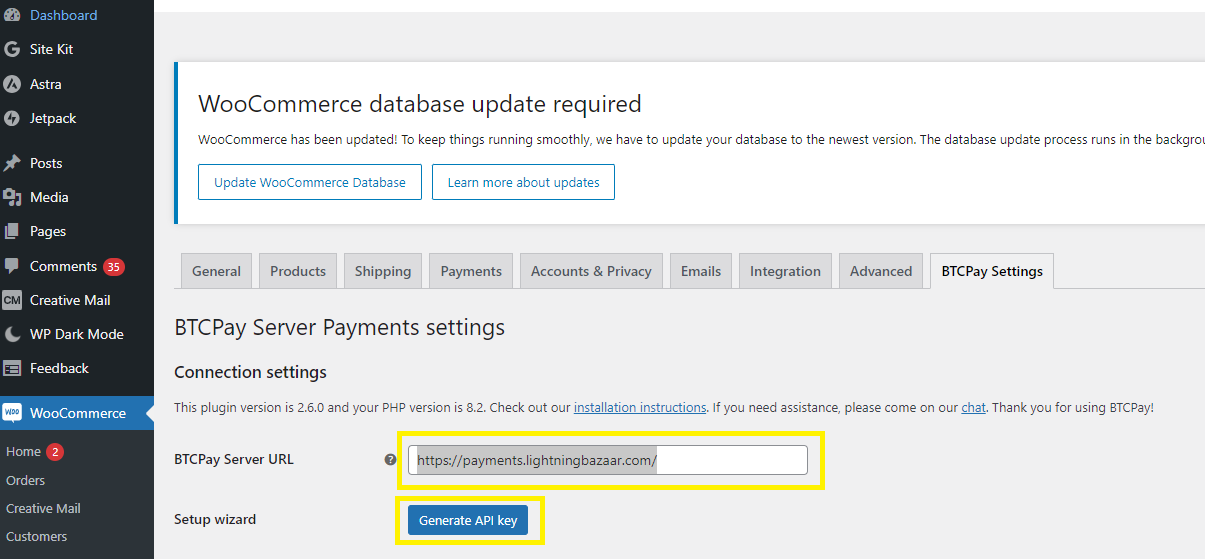
#2.1 Connect using the API key wizard (recommended)
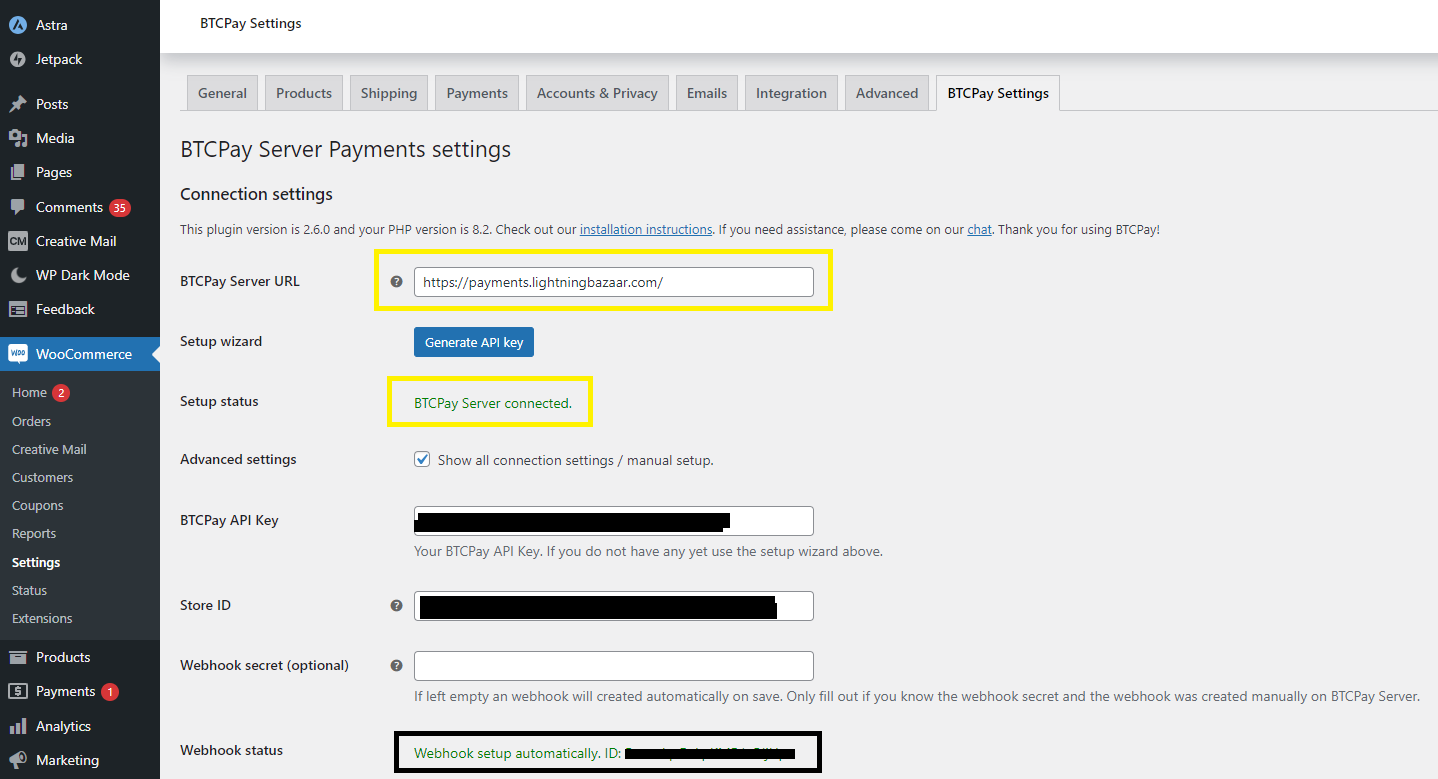
- In the field “BTCPay Server URL”, enter the full URL of your host (including the https) – https://payments.lightningbazaar.com
- Click on the link “Generate Api Key” button (you will be redirected to BTCPay Server “Authorization request” page).
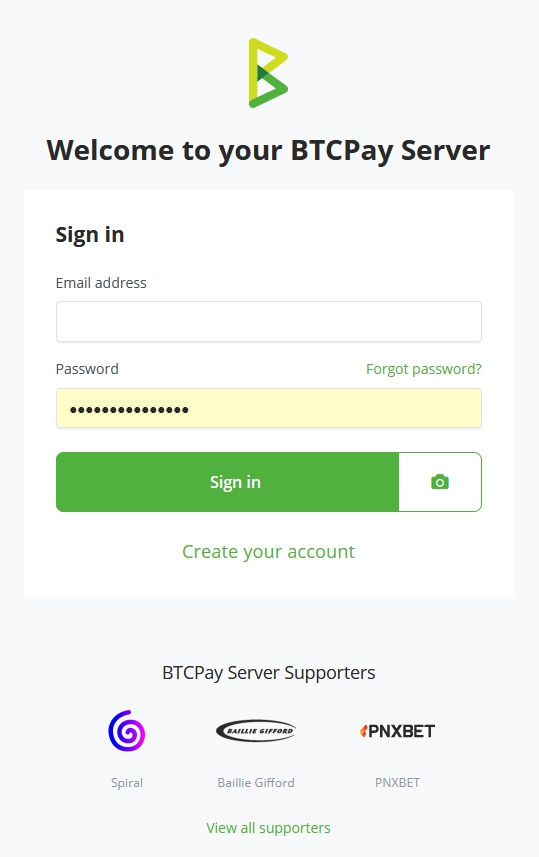
3. If you are not logged in to your BTCPay Server instance, do so now. (optional)
4. Select the store you want to connect to (if you only have one store it will get autoselected).
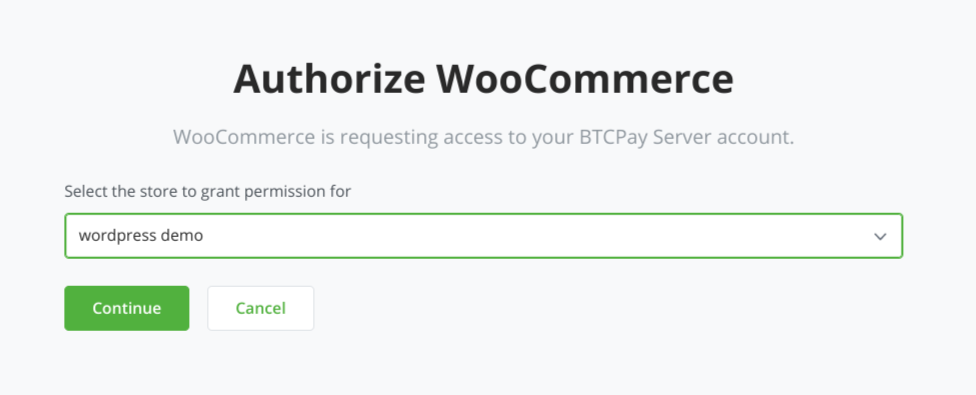
5. All required permissions are prefilled already, you just need to click [Authorize app]
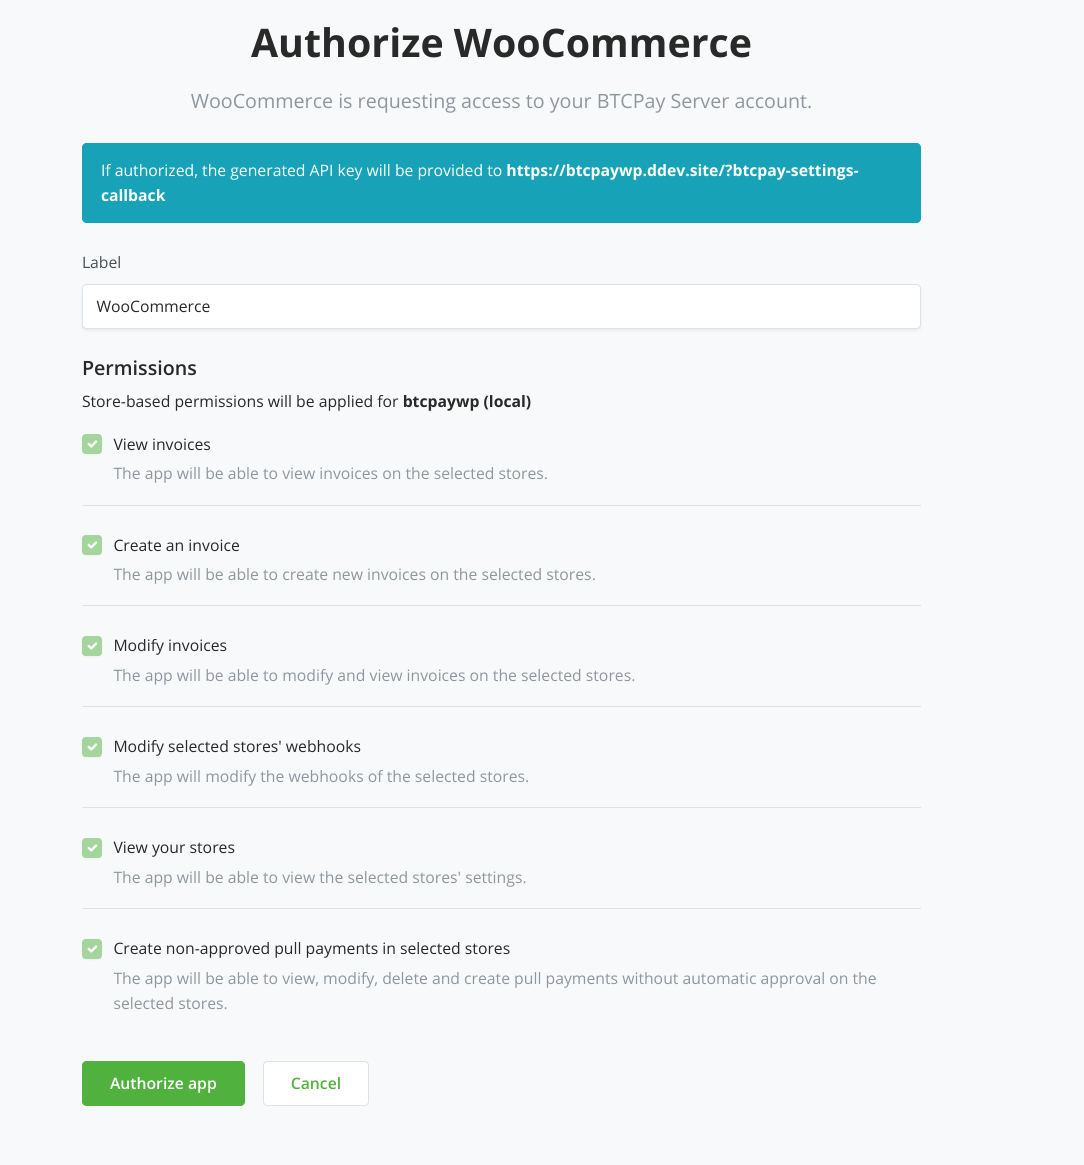
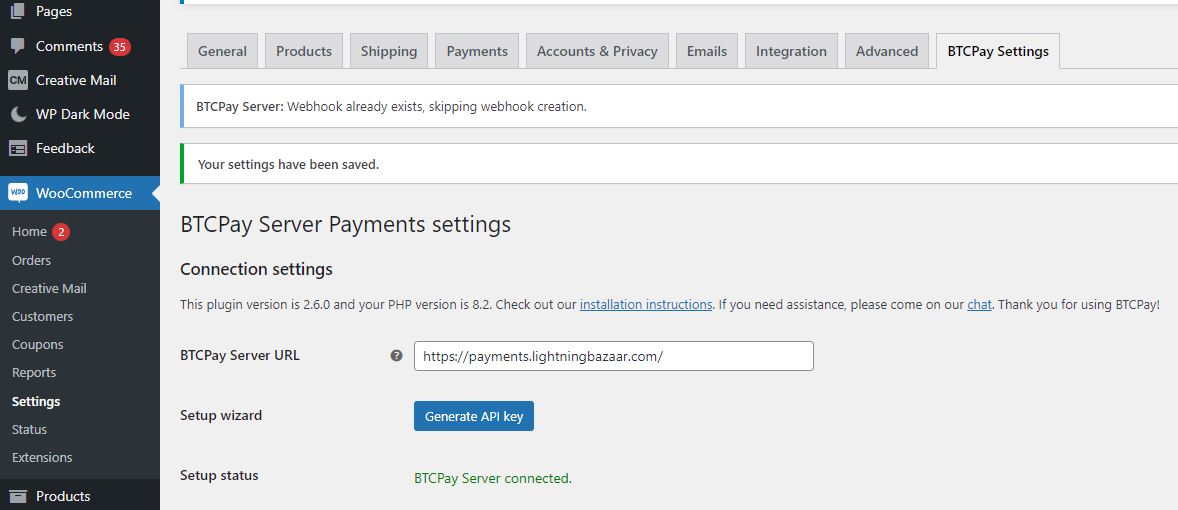
6. You will get redirected back to your WooCommerce store and the API key and Store ID will be prefilled. Additionally, the webhook will have been created automatically for you. Check the “Webhook status” field to show “Webhook setup automatically.” followed by an ID.
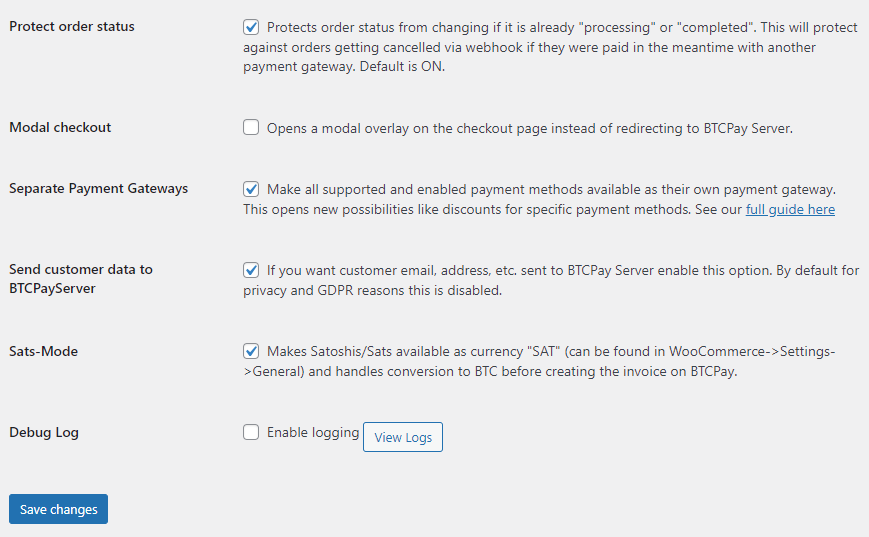
7. Choose which options you’d like to enable below. (Lightning Bazaar site has the ones enabled below) Click [Save] to be sure all is set.
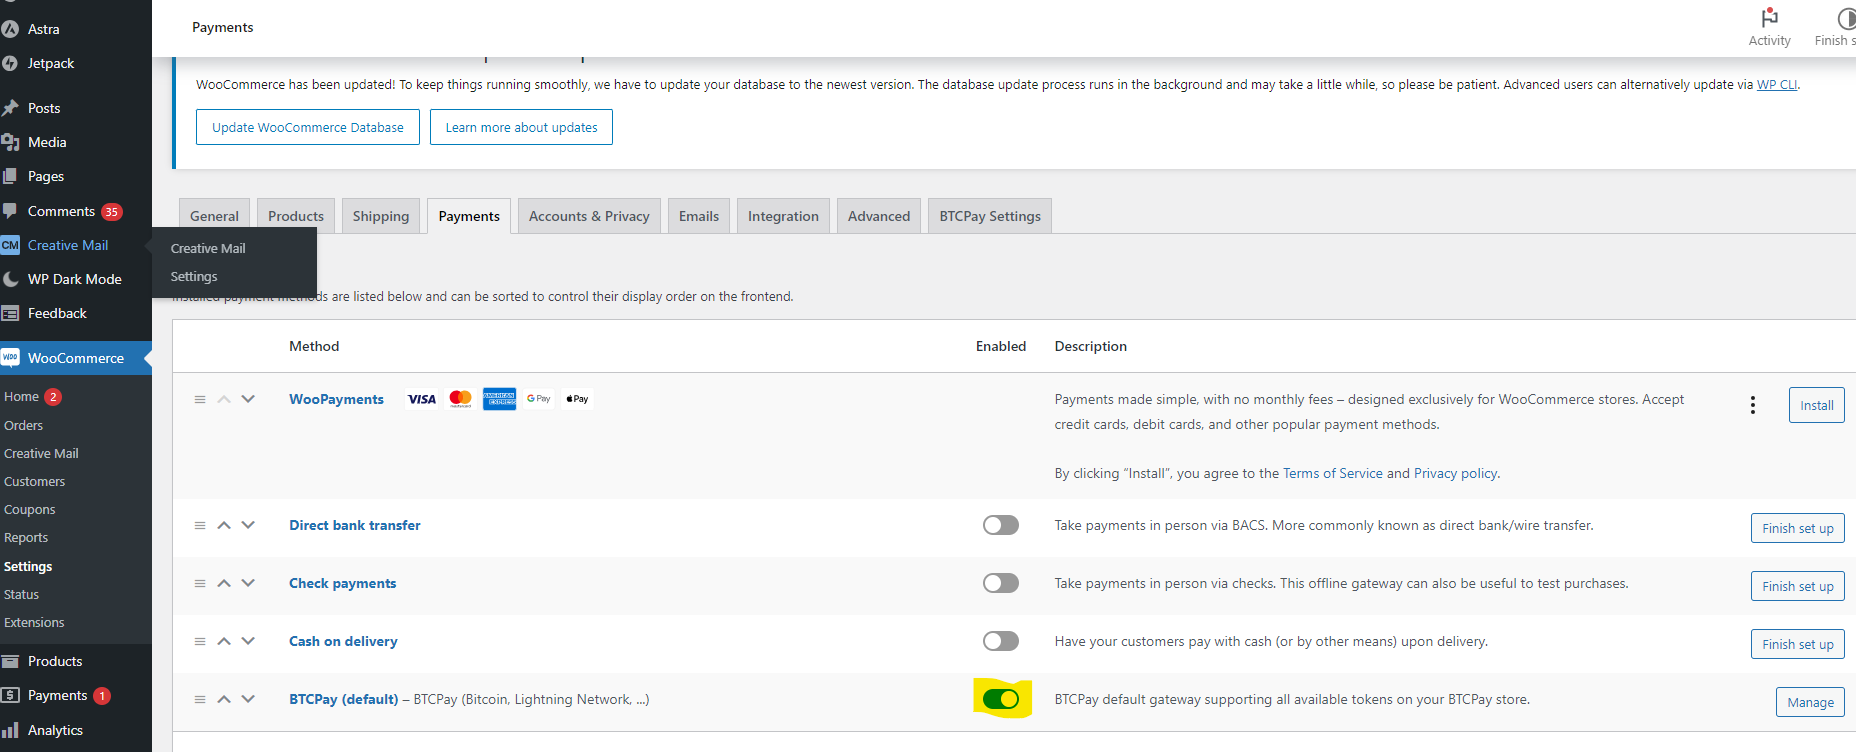
8. To make the Bitcoin payment gateway show up on your checkout. In the sidebar go to “WooCommerce” -> “Settings”, click on the “Payments” tab and enable the “BTCPay (default)” payment gateway.
3. Enabling your Site’s On-Chain Bitcoin Wallet
Assumption:
The strategy we are following here is based on you as a user wanting to have easy access and control over any funds as soon as they are received by your store. This means we will help you set up a non-custodial wallet on your mobile phone that will also be used for your store.
Note: Your store’s payment platform hosted on Lightning Bazaar’s server will not have access to the seed you will generate for the wallet on your phone. Therefore payments may only be received to your store through LB’s hosted service. They cannot be sent.
They can however be sent via the same wallet on your phone that holds the seed.
We will be using Blue Wallet to achive this, which is available in respective IOS/Android App stores
(If you do not want to have a wallet on your phone you may import an XPUB file from a hardware wallet to achieve the Assumption 1 above).
- Install Blue Wallet from the IOS/Android App stores
- Choose “Add Wallet” and then select “Bitcoin” with the default settings (you may give it a name) and click “Create”
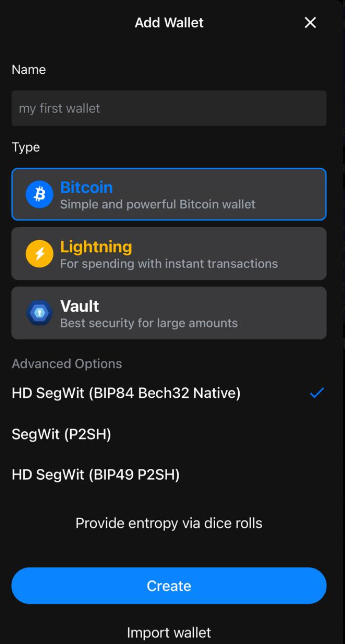
Write down and keep the 12 Seed words safe – if you lose them then you lose all your funds
You now have an On-Chain wallet ready to add to your store so it can generate invoices for your clients – all we have to do now is connect it!
3.1 Connecting your Wallet to you Bitcoin Store
If you’ve been logged out, log back in to https://payments.lightningbazaar.com/
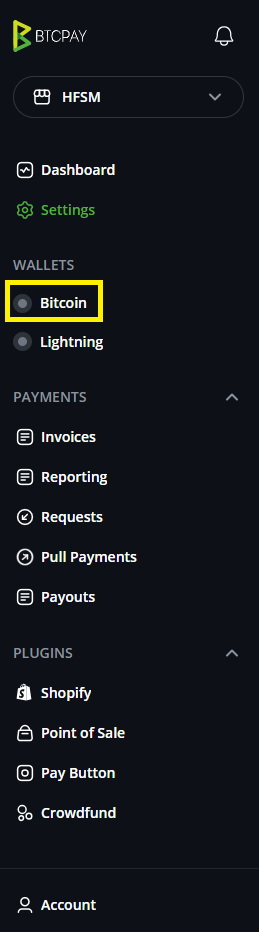
Under “Wallet” Select “Bitcoin”
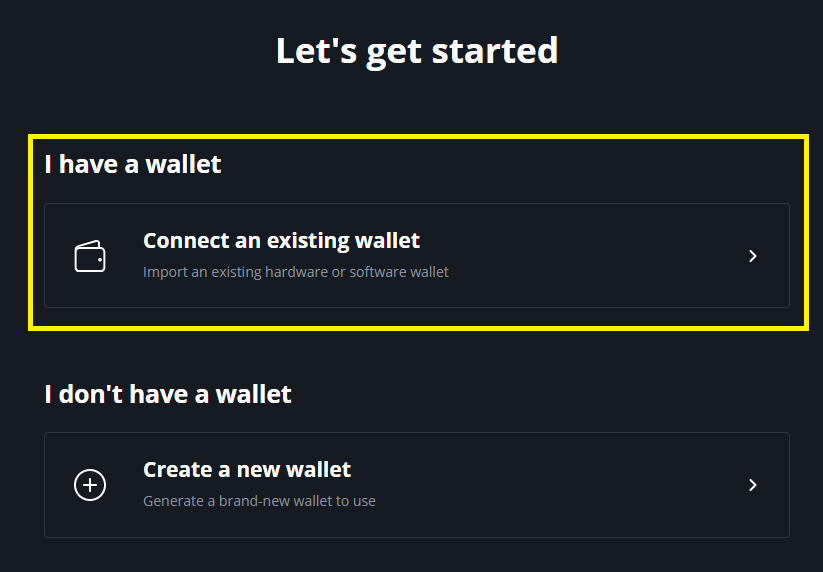
Then choose “Connect Existing Wallet”
Select “Scan wallet” QR (this will enable your devices camera)
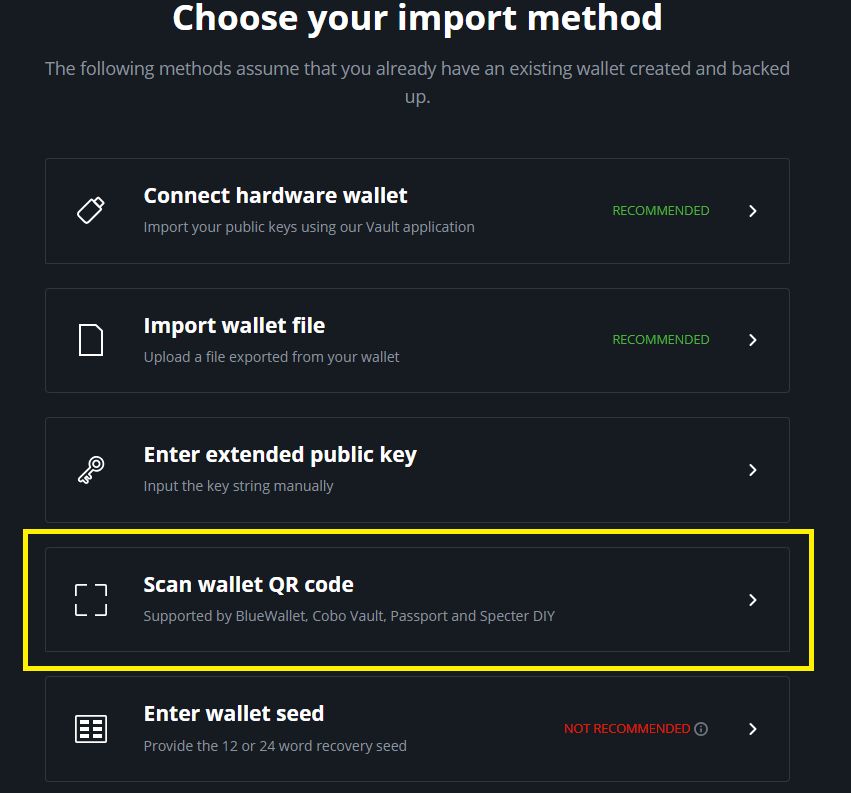
On your phone in the Blue Wallet app select the Bitcoin Wallet you created so you can see the coloured header at the top of the screen then select the three dots
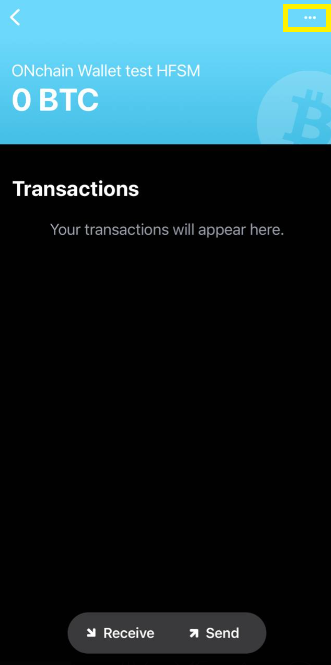
Click “Show Wallet XPUB”. This will bring up the QR code that enables receiving addresses to be generated by the wallet. Place it in front of the camera.
Once detected, press “Submit” and then “Confirm”
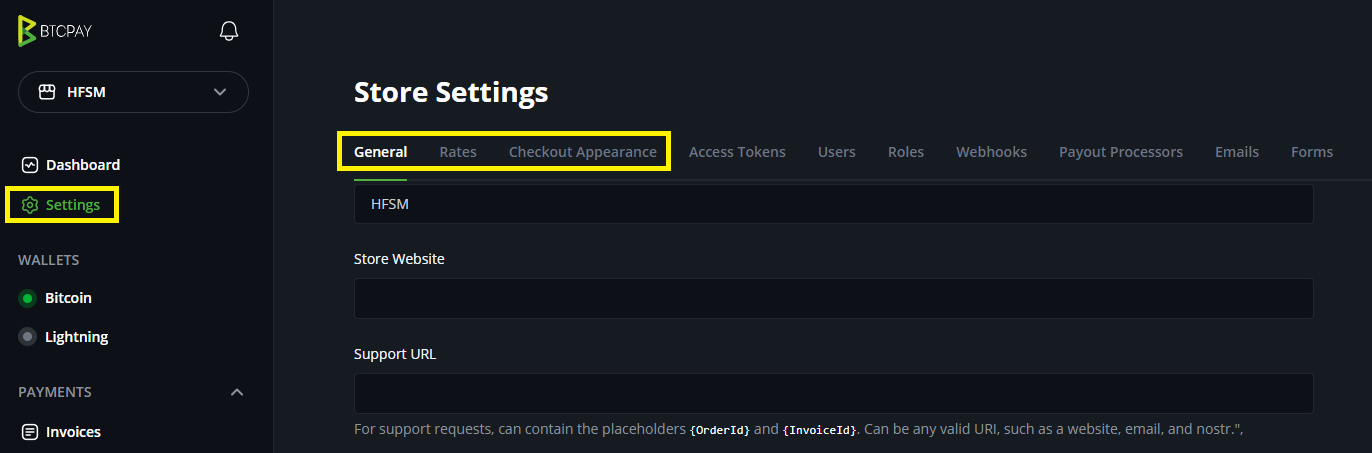
This will bring you to your BTCPay Store’s On-Chain Bitcoin Wallet Screen
Click “Save Wallet Settings” and then “Save Payment Settings”
Back in your BTCPay Server settings you can experiment with the checkout experience:
Congratulations! You now have your Bitcoin Wallet integrated with your website’s checkout experience.
Try purchasing an item from your site and see the option to pay with Bitcoin – it will look something like the images below*
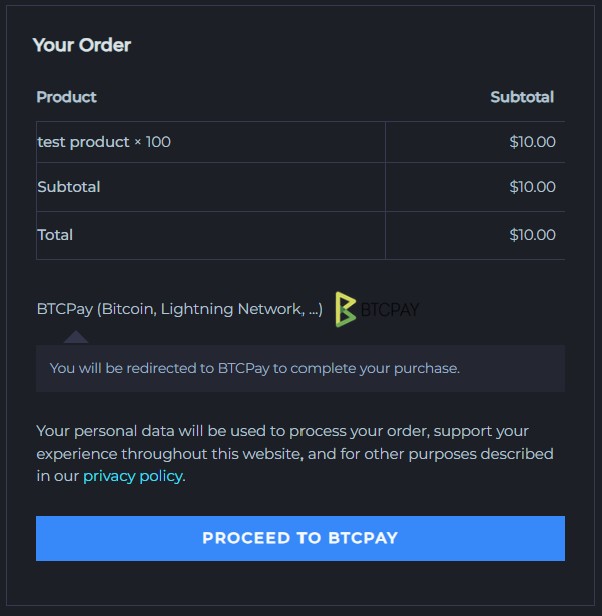
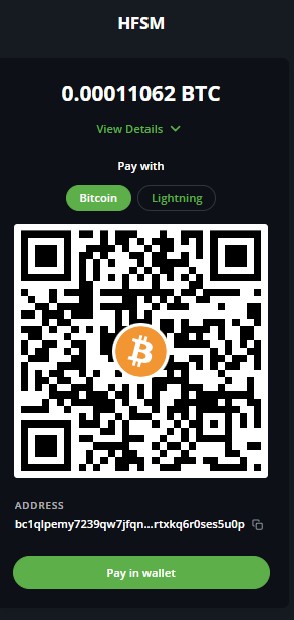
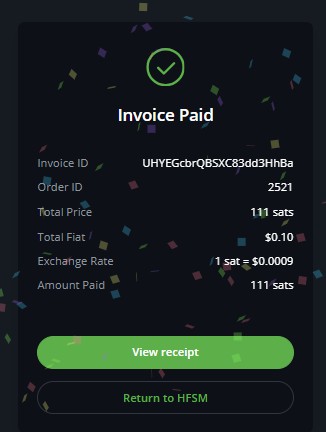
*Images for demonstration purposes only (not a real transaction)
For a full view of how payments move from checkout to your wallets, see the Final Payments Process Flow.
4. Enabling Lightning Payments
You can now move on to the next section we provided you in our setup email to enable Lightning payments.
Reach out to us on X @BazaarLightning or send us an email to info@lightningbazaar.com if you have any issues or feedback.